Find svar på
dine spørgsmål
Se vores simple guides
Nedenfor finder du svar på de mest stillede spørgsmål.
Kontakt os direkte, hvis du er i tvivl om yderligere.
- Rules gift cards must meet to be issued tax-free as a gift to an employee
- Redeeming with the Life Peaks Web Application
- Redemption with Life Peak’s QR scanner
- Extension of validity
- Cancellation of gift cards
- Change greeting or image on personal greeting
- Manual issuance of gift cards
- Guide to bookkeeper lists
- Reconciliation of revenue
- Use of right of redemption and right of withdrawal
- Customize attendee lists with one line per order
- Tracking data with Google Analytics and other tools
Tracking data with Google Analytics and other tools
Guidance for tracking data with Google Analytics and other tools
Overview:
This guide describes 2 ways to track which traffic sources generate sales and their revenue.
A simple redirect solution back to your own site upon purchase, and an extended solution in the form of cross-domain tracking.
The same methods and tag manger triggers described for Google Analytics can be used to set up tracking for other marketing systems than Google Analytics.
Before describing solutions, it is worth mentioning that it is possible to disable Life Peak’s cookie consent tool if you want to implement your own on lifepeaks.dk sites.
The simple solution:
The simple redirect solution is sufficient for many when it comes to checking the value of your marketing efforts and optimizing them.
When you purchase a gift card, you ask lifepeaks to redirect back to a thank you page for gift cards on your own site that you create and set up goals for yourself in google analytics.
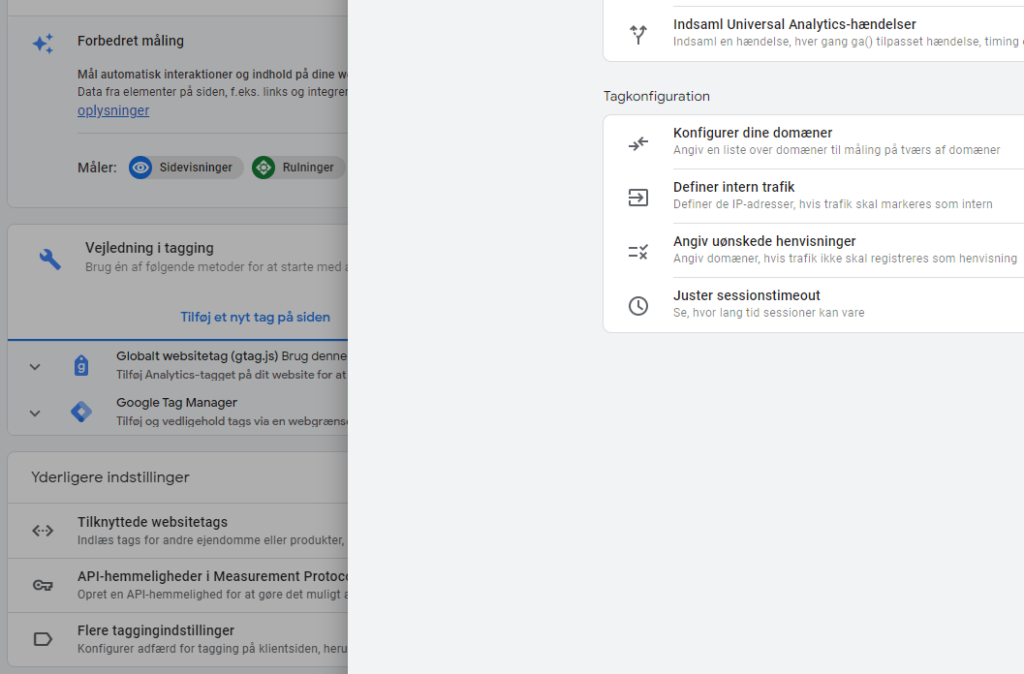
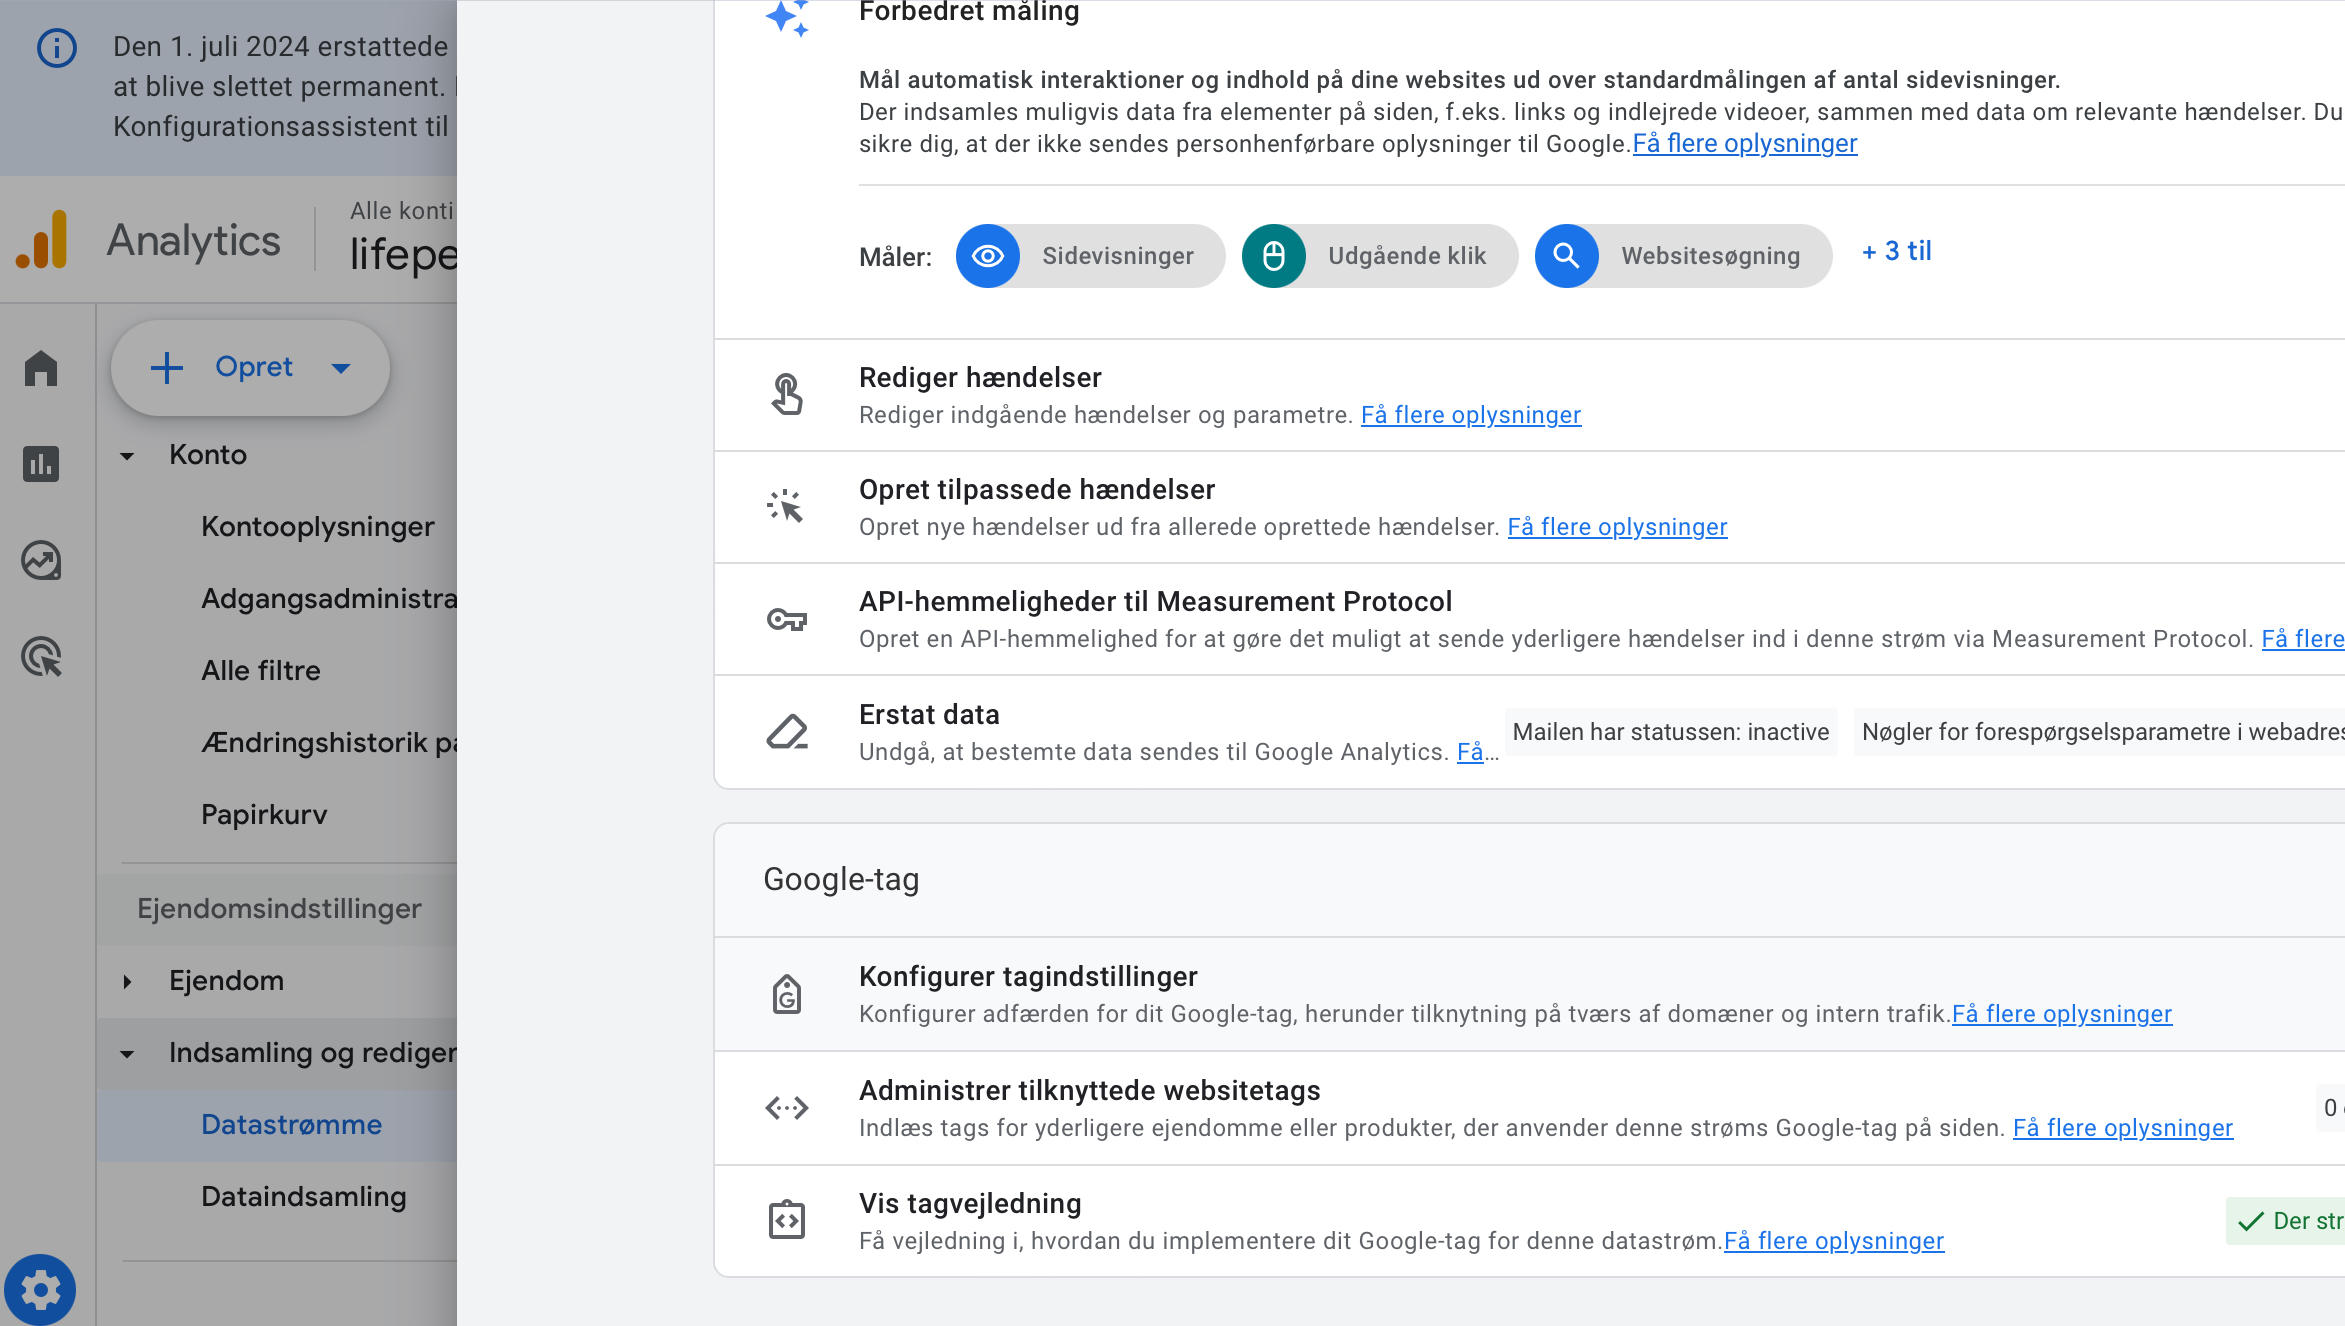
In addition, for GA4, you must create lifepeaks.dk as an unwanted referral under google analytics admin (nut at the bottom left of the first image below) -> data streams -> click on the existing data stream and select configure as shown in the first image.
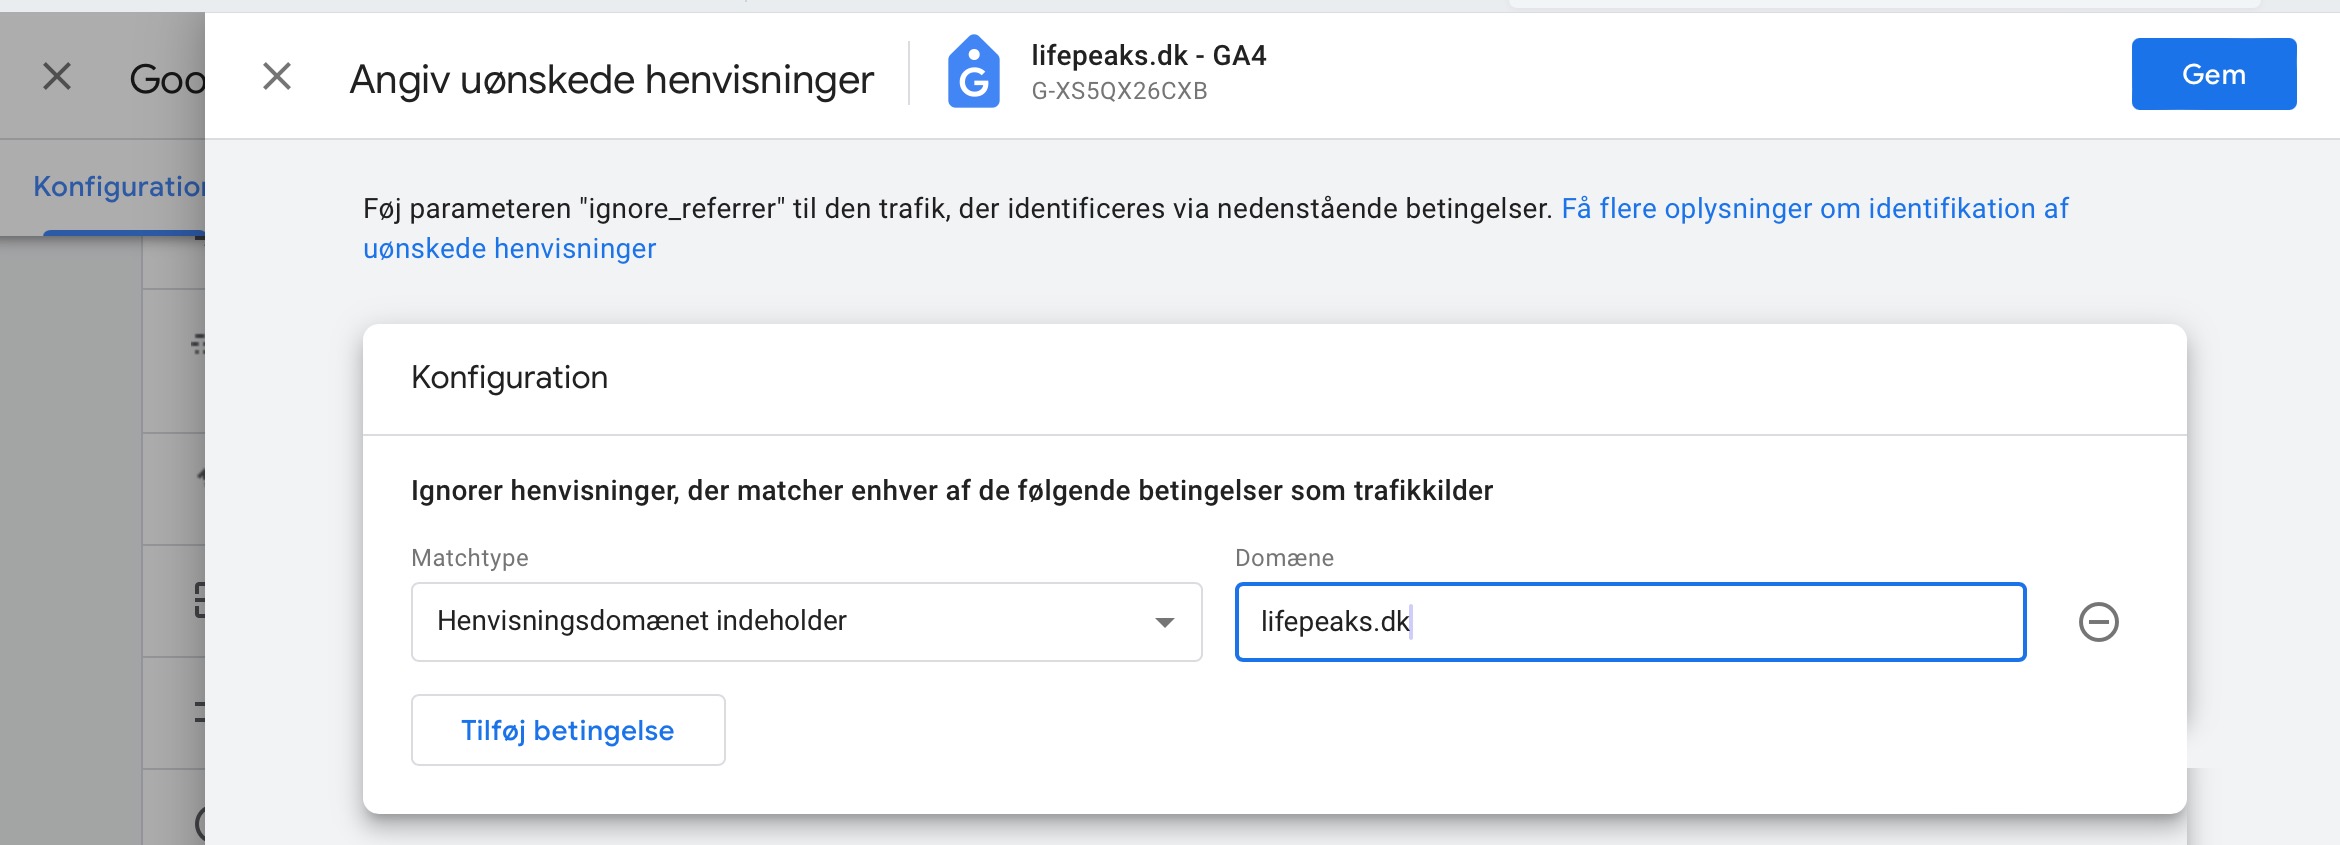
Under unwanted referrals, enter lifepeaks.dk as shown in the next image, in addition to your own domain which should already be there.
This way, the original traffic source that brought your users to your site is preserved.
In addition, the user’s chosen consent from their visit to your site is reused.
In addition, the URL for your own thank you page, which lifepeaks.dk redirects to upon your request, will contain the transaction id and the total value as exemplified here: https://test.com/?transaction_id=647bba344396e7c8170902bcf2e1555165658a87758051.784&total=1010.
The only thing you miss out on by choosing the redirect solution is the lifepeaks thank you page with pdf links to gift cards and more (however, these are sent to gift card buyers by email), as well as extended analytics data.
The extended solution:
The extended solution uses cross-domain tracking.
This guide assumes that the same tag manager container ID (hereafter container) is used on both the primary website and on lifepeaks.com
If you want to run with two containers, this is also possible. In that case, after the import described in point 2 below, you ‘simply’ extract the ‘iframe host domain’ code part from the ‘lifepeaks iframe’ tag and put it in the other tag manager container in a custom HTML tag, with a tag manager trigger on the pages where the lifepeaks iframe is loaded or just an all pages trigger if in doubt, and a ga4 event tag identical to the imported one.
If you run with only one tag manager as the guide suggests, it may mean that some tracking systems will get extra data.
Basically, this doesn’t matter, but some people may want to be aware of this and with new implementations and changes, it’s always a good idea to check your data in the following days.
The user’s chosen consent from their visit to your site is reused by the iframe implementation of the lifepeaks gift card purchase thank you page.
If the lifepeaks gift card purchase thank you page is loaded as a regular link with lifepeaks.dk in the browser address bar, the lifepeaks cookie consent tool controls whether data is sent, unless you have implemented your own consent tool as mentioned at the beginning of this article.
Guidance for setting up the extended solution:
1. Download Life Peaks Ecommerce Tracking Zip her and extract the file.
2. Go to the Admin section of Tag Manager and click ‘Import Container’
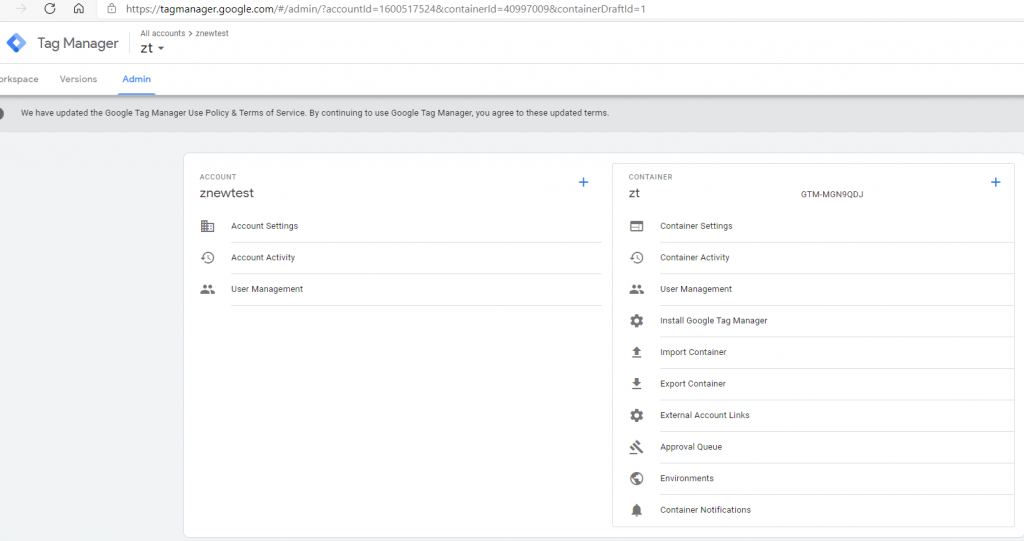
3. Import the ‘lifepeaks ecommerce tracking.json’ file and select ‘existing’ workspace, ‘merge’ and ‘rename’ as shown, duplicates of triggers and variables can be removed afterwards.

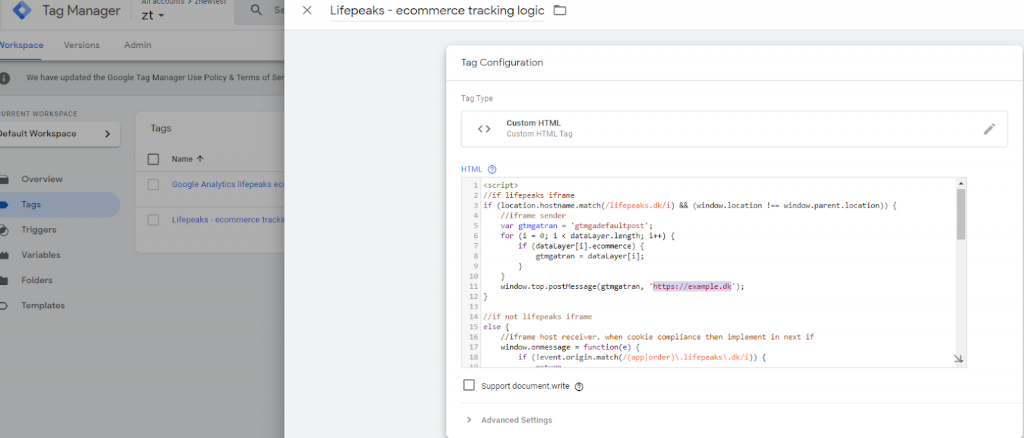
4. Open the tag ‘lifepeaks – ecommerce tracking logic’ and instead of ‘https://example.dk’ enter your own website and in the same syntax.
For example, open your site in a browser and copy past URL from there, but do not include any subpages, and end with dk and not dk/.
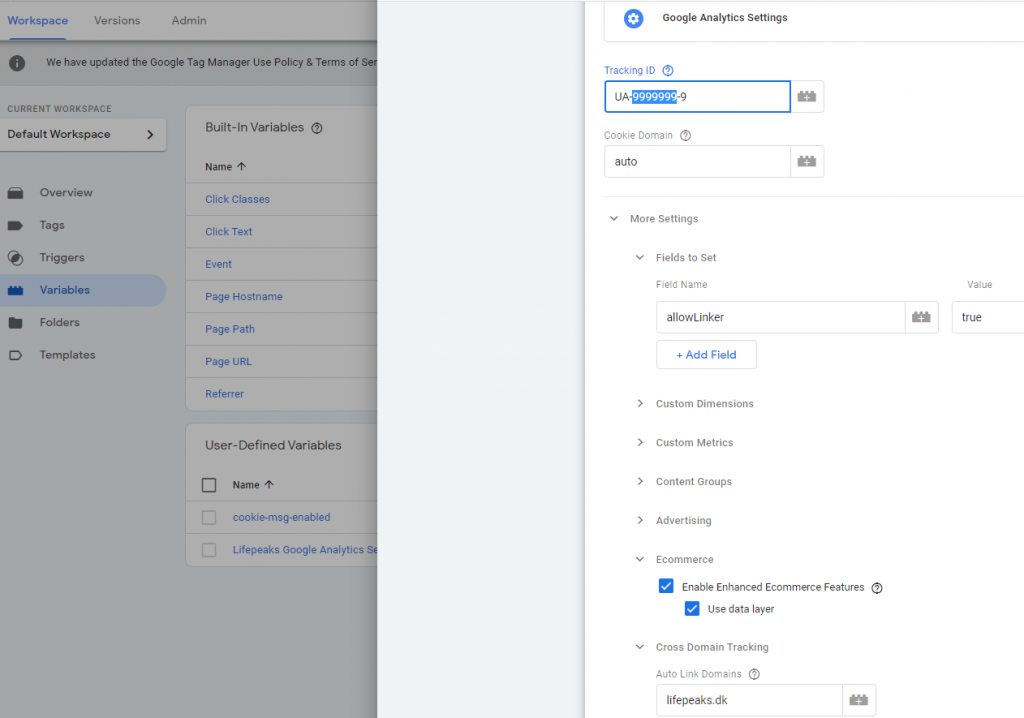
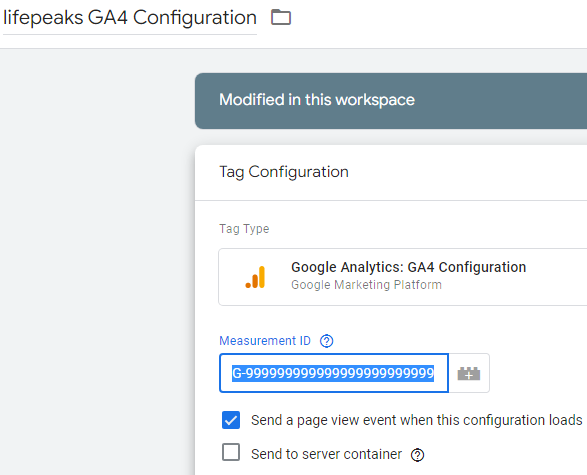
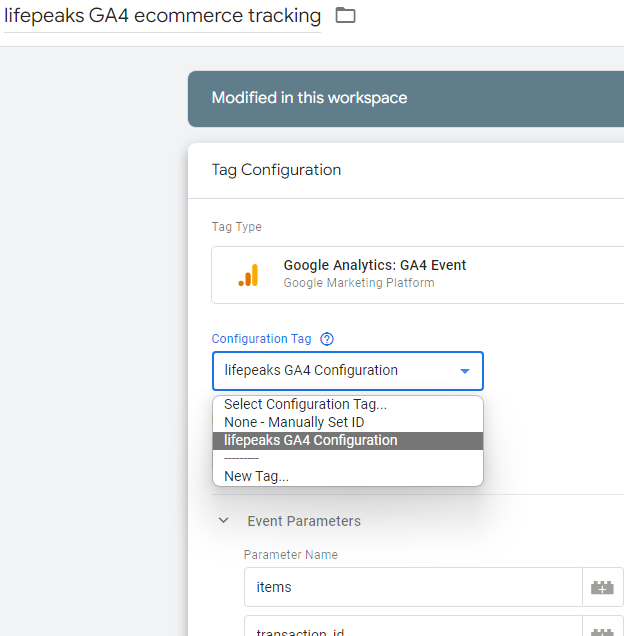
5. Go to the lifepeaks GA4 configuration tag and paste your GA4 tracking ID. For the purchase tag refer to the newly changed lifepeaks GA4 configuration tag
Alternatively, for the lifepeaks GA4 purchase tag, you can also refer to your own GA4 configuration tag and not fill in the lifepeaks GA4 configuration tag as mentioned at the beginning of this point.
6. Publish Tag Manager.
7. In GA4 under admin->property settings->data streams->web->more data settings->configure domains add lifepeaks.dk.
This completes the setup of cross domain tracking and purchase data will now enter your GA4.
